The Ultimate Guide to Surface Roughness: Measurement, Parameters & Real-World Applications
Surface roughness isn’t just a matter of looks—it defines how parts perform, how long they last, and whether they pass critical quality tests. From aerospace engine blades to medical implants and smartphone frames, the microscopic peaks and valleys on a surface influence friction, sealing, fatigue resistance, and even bonding strength.
This guide will help you fully understand what surface roughness really is, how it’s measured, what Ra and Rz actually mean, and how these parameters play out across real manufacturing scenarios. Whether you’re designing precision components or sourcing machined parts, mastering surface roughness is key to quality and performance.
What Is Surface Roughness and Why Does It Matter?
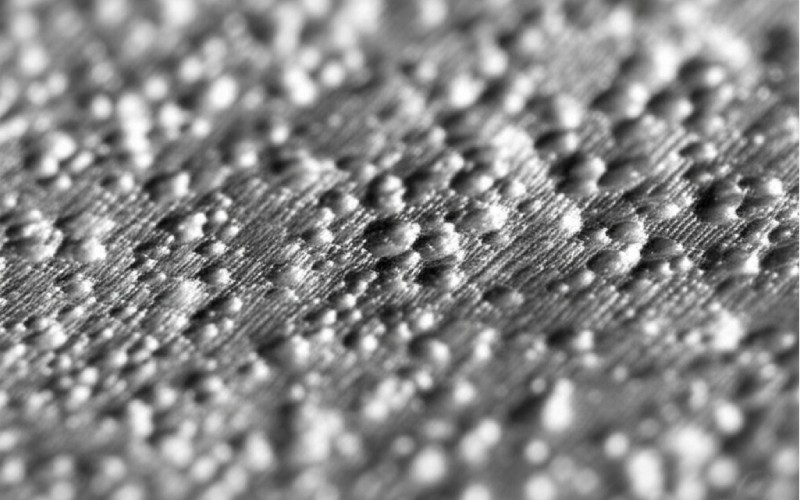
Surface roughness refers to the tiny irregularities on a component’s surface—even a polished part has microscopic peaks and valleys. These features can impact how parts slide, seal, wear, or adhere. For example, in hydraulic valves, if sealing surfaces exceed a target Ra, fluid leakage may occur. In optical devices, an Ra above 0.1 µm could scatter light and ruin performance. Controlling roughness isn’t just about aesthetics—it’s about ensuring that components perform as designed under stress, friction, or chemical exposure.
Key Roughness Parameters: Ra, Rz, Rq, and Rmax
The most common parameter is Ra (Roughness Average)—it calculates the arithmetic mean of all absolute deviations from the mean line of the surface profile. It’s useful for general surface texture evaluation. But if you’re concerned about sharp peaks or deep valleys, Rz is more insightful—it measures the average height between the highest peak and lowest valley across sampling lengths. Rq, or root mean square roughness, is similar to Ra but gives more weight to large deviations. Rmax measures the single largest peak-to-valley distance. Choosing the right parameter depends on what the part needs to do—whether that’s smooth motion, tight sealing, or fatigue resistance.
How Is Surface Roughness Measured?
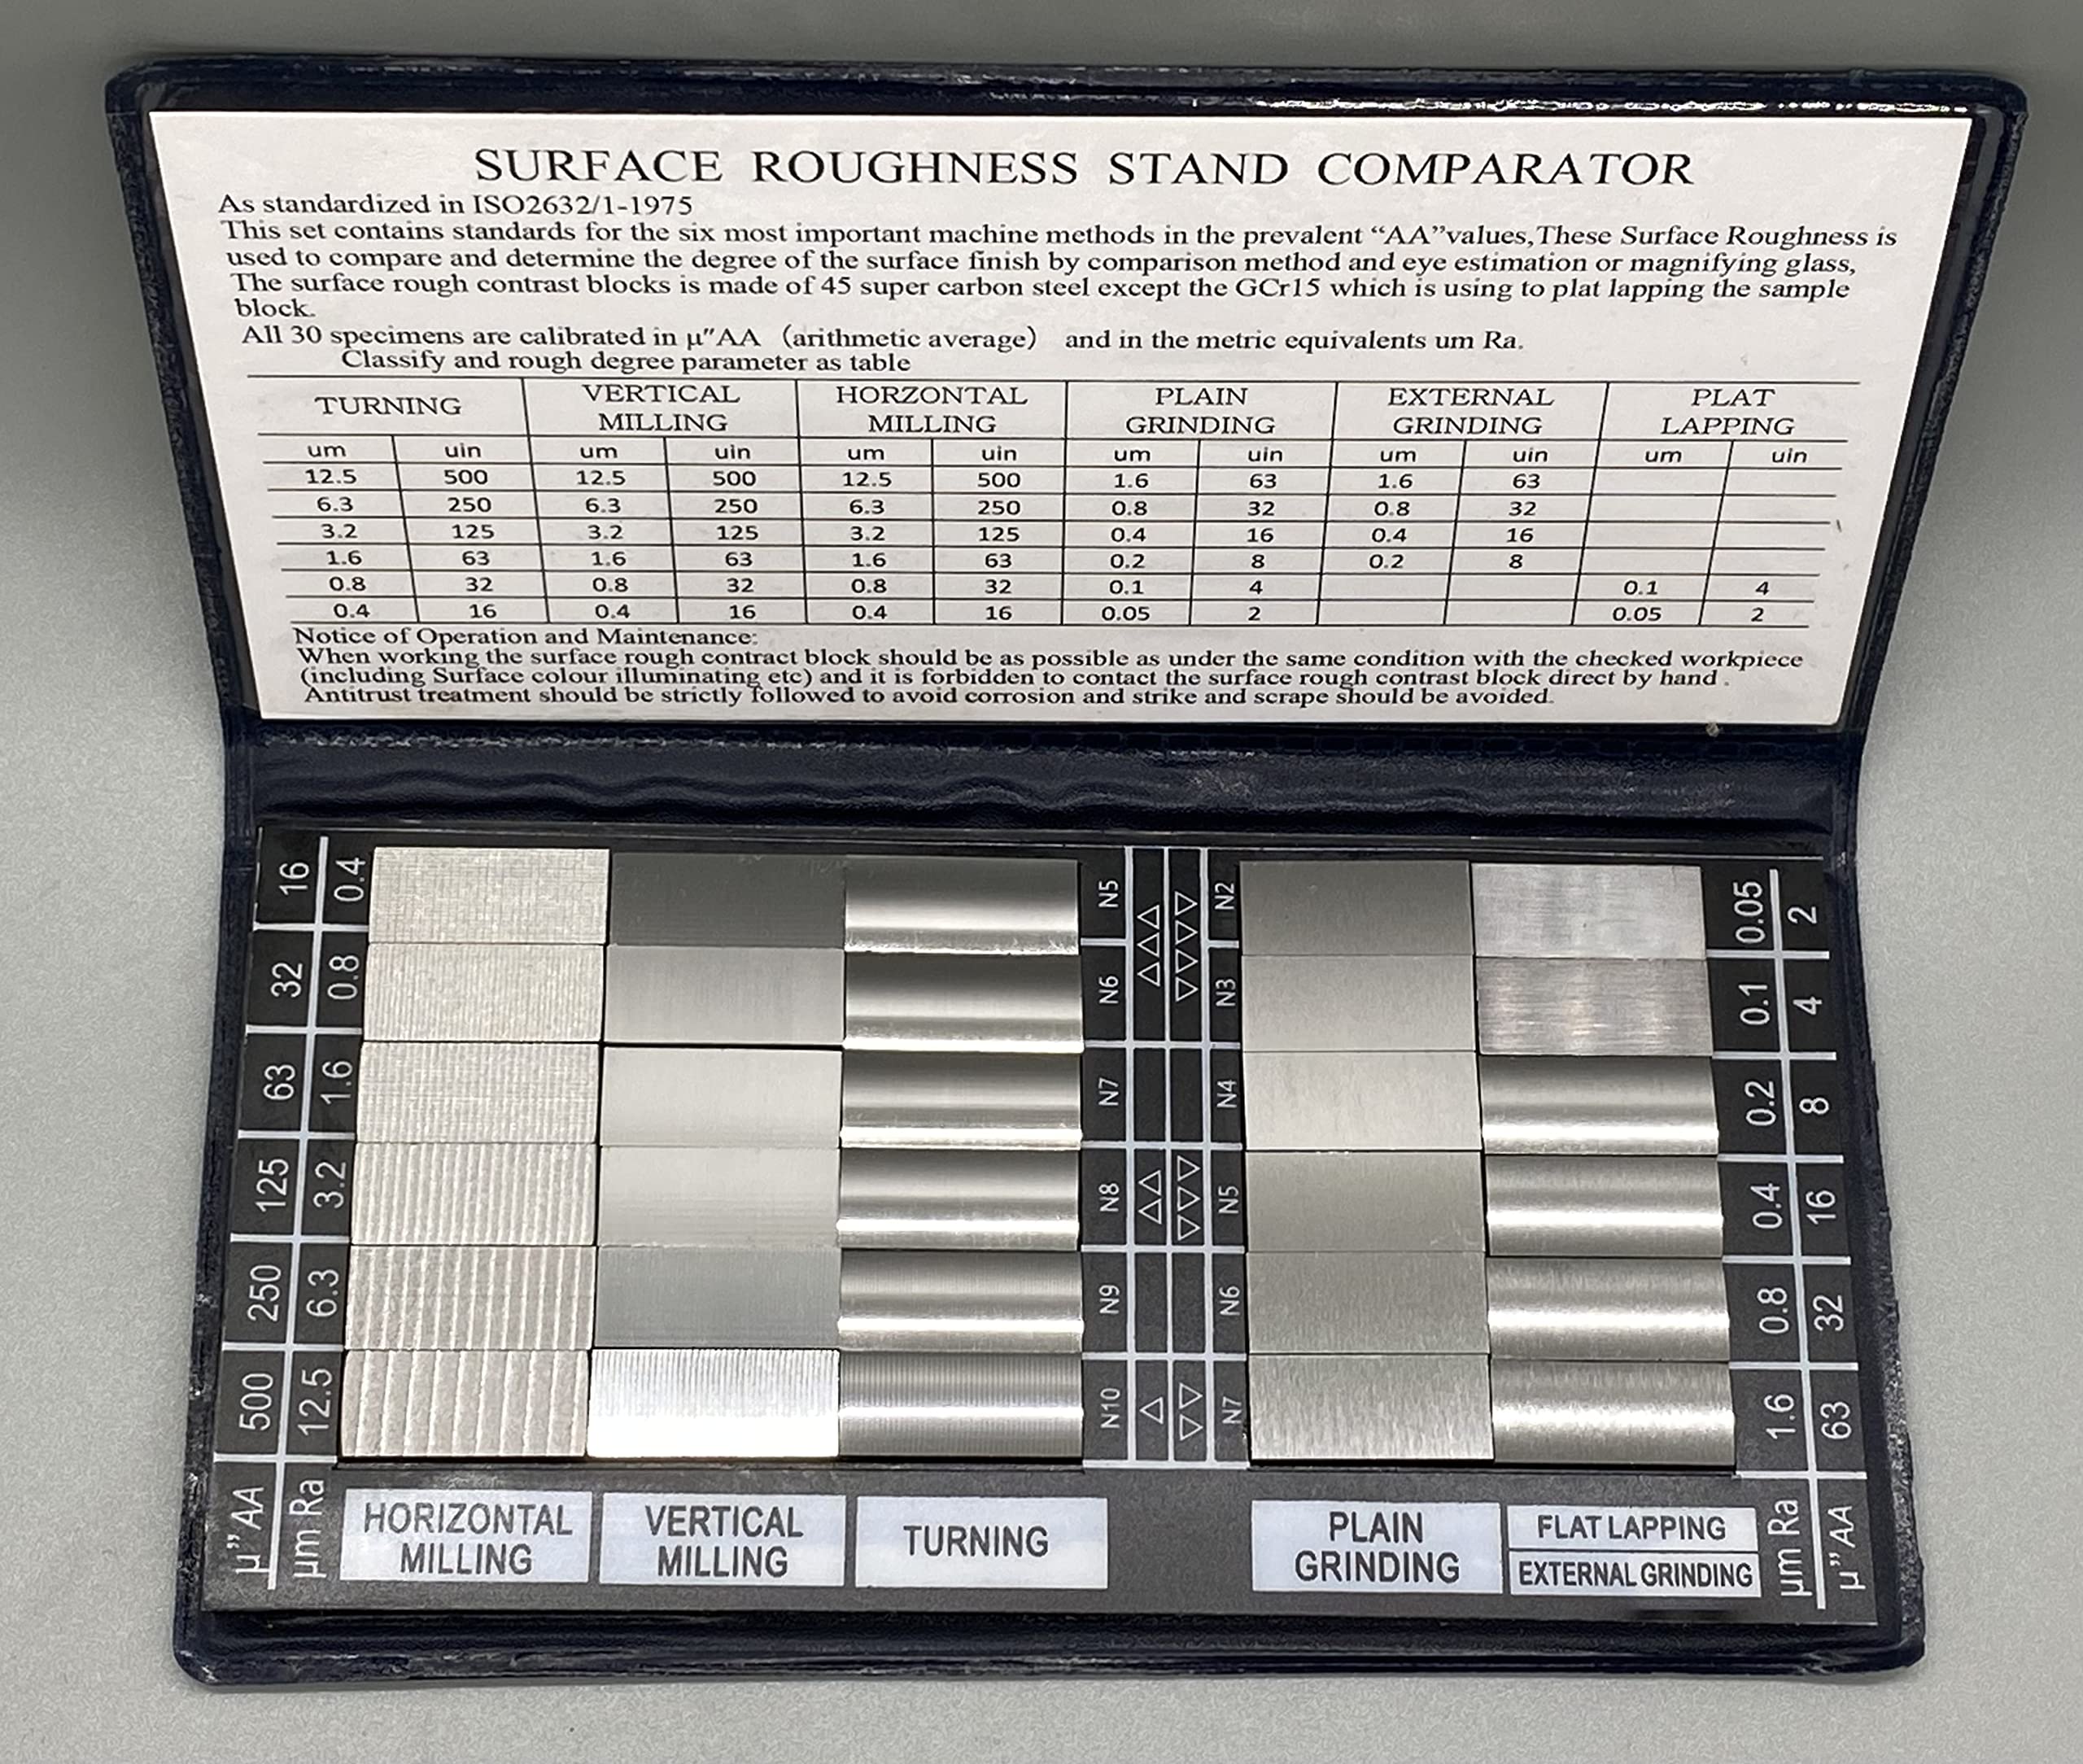
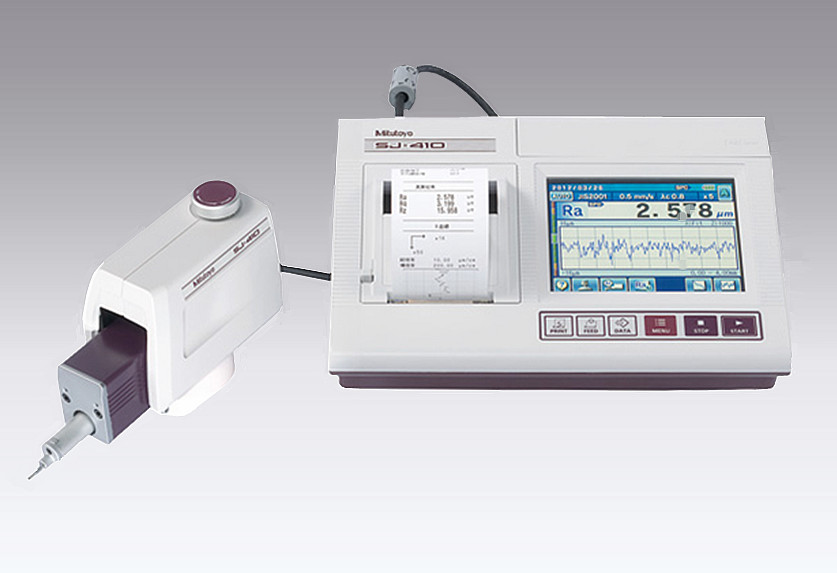
Surface roughness measurement requires high-precision tools. The most common method is contact profilometry, where a diamond stylus moves across the surface and records height changes. It’s accurate and widely used in metals and plastics, though not ideal for soft or delicate surfaces. For those, non-contact methods like white light interferometry or confocal microscopy offer precise 3D mapping without touching the surface. On the shop floor, machinists often use roughness comparators—physical reference blocks—to get a quick feel for Ra levels before final inspection.
Surface Roughness Across Manufacturing Processes
Each machining or forming method leaves a distinct surface signature.
Sand casting typically yields a rough surface, with Ra above 12.5 µm.
Rough turning creates visible tool marks (Ra = 3.2–12.5 µm).
CNC machining offers tighter control (Ra = 1.6–6.3 µm).
Grinding brings Ra down to 0.4–3.2 µm, ideal for sealing surfaces.
Polishing and lapping can push Ra below 0.05 µm, essential for optics or implants.
Example: A titanium Ti‑6Al‑4V turbine disc for aerospace was machined on a 5-axis CNC machine and then ultra-fine ground, reducing Ra from 3.2 µm to 0.15 µm. This improved fatigue life by 25% and enhanced oxidation resistance at high temperatures.
How to Use a Surface Roughness Chart
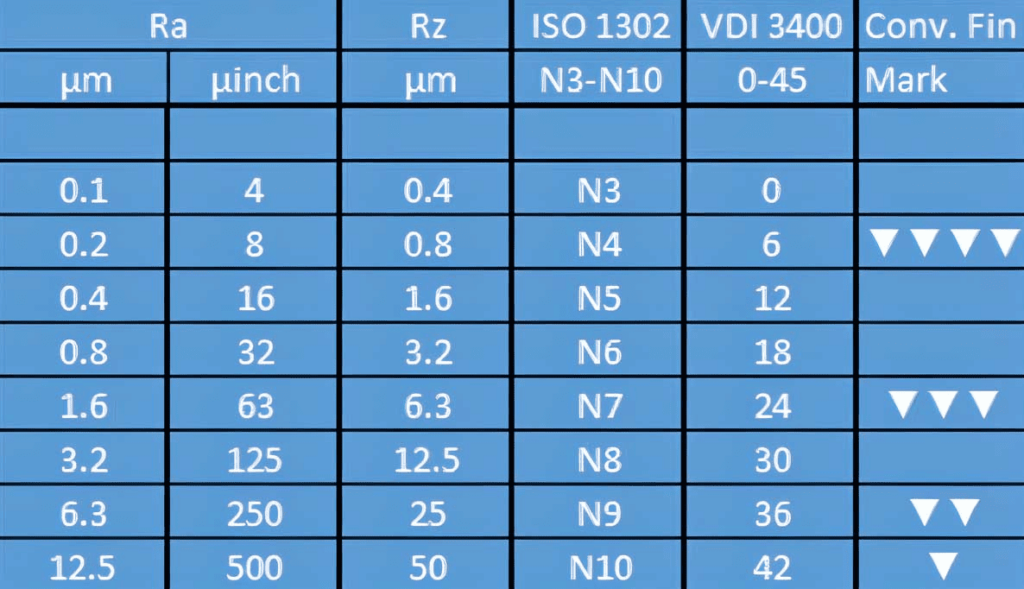
Surface roughness charts help engineers and buyers match desired surface finishes with feasible manufacturing methods. For instance, a part requiring only a functional fit might work well with CNC turning (Ra = 3–6 µm), while high-performance seals may demand grinding (Ra < 0.8 µm) or even lapping (Ra < 0.2 µm). Charts also show ISO 1302 symbols for specifying roughness directly on technical drawings—ensuring consistent understanding between designers, suppliers, and QA teams.
Roughness Unit Conversion and Parameter Translation
Surface roughness can be expressed in µm (micrometers) or µin (microinches), with 1 µm ≈ 39.4 µin. Approximate conversions between parameters include:
Rz ≈ 4 × Ra
Rq ≈ 1.1 × Ra
However, since Ra and Rz capture different surface characteristics, these conversions are not always perfect. For critical parts, rely on actual measurements and 3D profiles.
Surface Texture vs. Surface Roughness
Surface roughness is just one part of a surface’s full texture. Texture includes:
Roughness (fine-scale deviations),
Waviness (larger undulations from vibrations or warping), and
Lay (the pattern or direction left by machining).
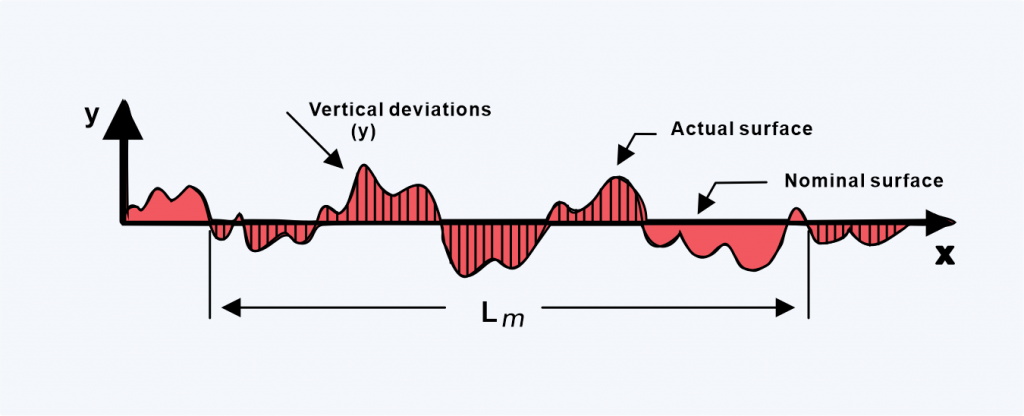
A complete surface specification will define all three when necessary—especially in high-precision or high-load applications.
Real-World Applications Across Industries
Aerospace
A leading jet engine OEM used Ti‑6Al‑4V for turbine blades. After CNC machining and ultra-fine grinding, the final Ra was reduced to 0.08 µm. Fatigue resistance improved by 25%, and oxidation stability at 500 °C increased measurably.

Medical
A titanium hip implant base was polished and shot-peened, reducing Ra to 0.05 µm. This improved tissue bonding, reduced post-op complications, and extended implant life, verified through clinical studies.
EV & Battery
An EV manufacturer optimized sealing faces on aluminum battery enclosures to Ra ≤ 0.8 µm using CNC grinding and ultrasonic cleaning. This improved IP68 waterproof test performance by over 60%.
Consumer Electronics
A flagship smartphone frame was machined to Ra ≈ 0.4 µm after two grinding stages and anodizing. The result: better hand feel, increased scratch resistance, and a 30% drop in cosmetic defect rates after drop tests.
Final Thoughts: Why Surface Roughness Is a Competitive Edge
Surface roughness isn’t just a QC metric—it’s a performance driver. With the rise of digital machining, real-time monitoring, and AI-driven manufacturing, roughness will become a design-level specification, not just a post-process inspection. Manufacturers who can control, measure, and optimize roughness across the entire production cycle will set new benchmarks in reliability, functionality, and innovation.
Get a Free Quote!
Leave your contact details, or directly visit our online quoting platform to experience the future of material selection and production. Get expert material evaluations, tailored DFM analysis, and fast 24-hour production turnaround.
- Free Quote: Upload your designs, and our AI-powered engine will generate a custom quote in seconds.
- Talk to an Expert: Connect with one of our engineers via WhatsApp for immediate assistance.

